Applying brick: step by step
1. Prepare the surface before applying the brick slips. Is the surface flat, dry, free of strain, slightly absorbent and adequately solid? Is there adequate protection from wind and weather during the work while the adhesive mortar and brick slips cure?
2. If you do not trust a particular surface, first test whether the surface is suitable. As a guide, you
can use the overview below:

2 Follow supplier’s instructions on transition of panel seams to prevent cracking
3 If suitable for outdoor use
4 Provided that the substrate is supportive, smooth and pre-treated
3. Treat the surface with Elastolith Primer and let it dry for 24 hours.
4. The brick slips should be applied from top to bottom to avoid adhesive mortar residue getting onto
brick slips already applied. Choose a fixed starting point, preferably the top corner of a window
frame or door frame.
5. Determine the course size (height of the brick slip + 1 horizontal joint, also called the bed joint).
Plot out the course size on the surface. This can be done manually or using a measuring
instrument. Every 3-4 courses, use a guideline on the facade, for example a string line, chalk line,
or a laser instrument. Align the top of the brick slip with this. As standard, the joints are between
10 and 14 mm wide.
6. Cover window frames, window sills, paving and scaffolding sufficiently to prevent contamination.
If something does get dirty, clean it immediately with (lukewarm) tap water.
7. Always use brick slips from several boxes together for the ideal mix of texture and colour.
Because we use natural raw materials and colour pigments, minor colour variations may occur.
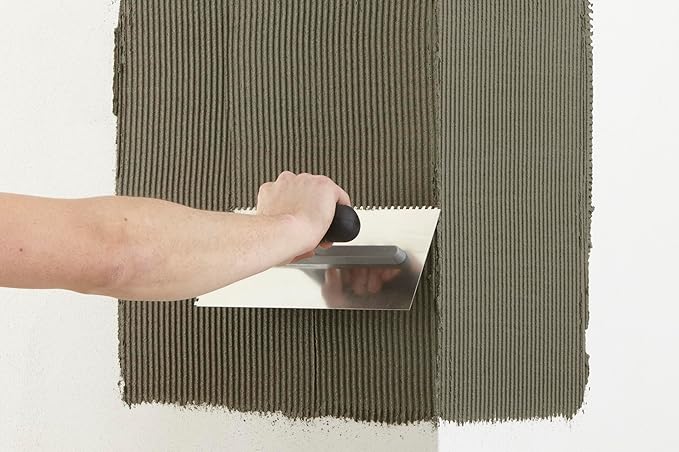
8. Apply the adhesive to the surface. The adhesive mortar has an open time of about 10 minutes
before it starts to dry. This means that the brick slips must be pressed into the adhesive and the
joints must be smoothened within 10 minutes. Because of this, only apply as much adhesive as
you can work with in about 10 minutes. This is usually not more than one half to one square
meter (Figure 1). If you are working in wind, sun and/or high temperatures, assume that this
time will be shorter.
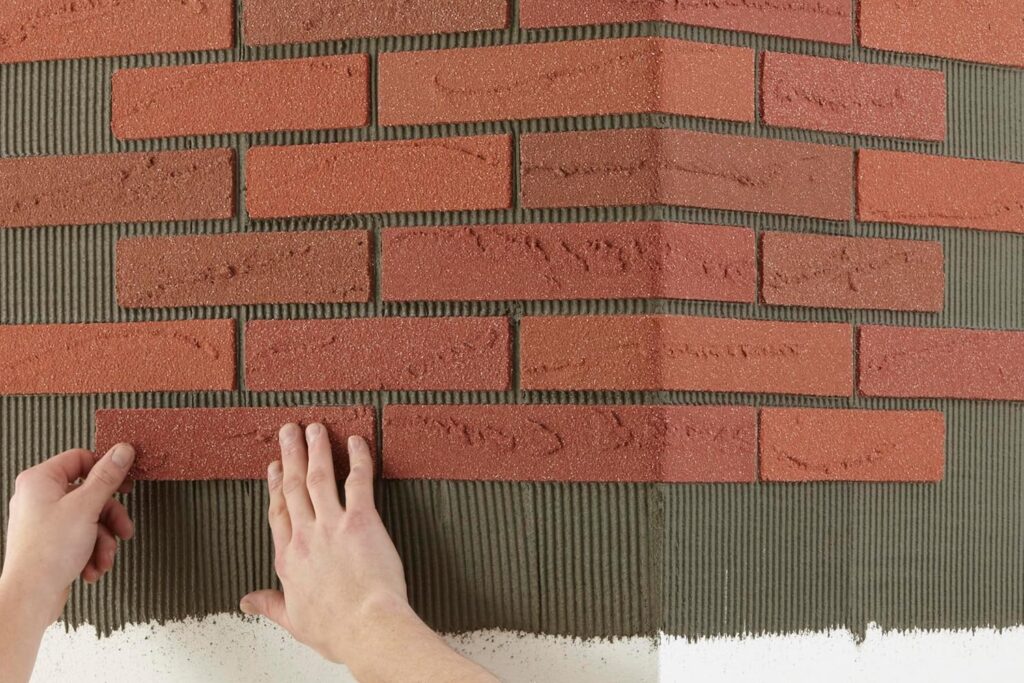
9. Use a notched trowel to apply the adhesive mortar from top to bottom (the ridges oriented
vertically). Do this in small areas at a time. The notched trowel should be held at an angle of
about 30°. If the applied adhesive mortar dries out, use a plant sprayer to add extra moisture
(mist setting).
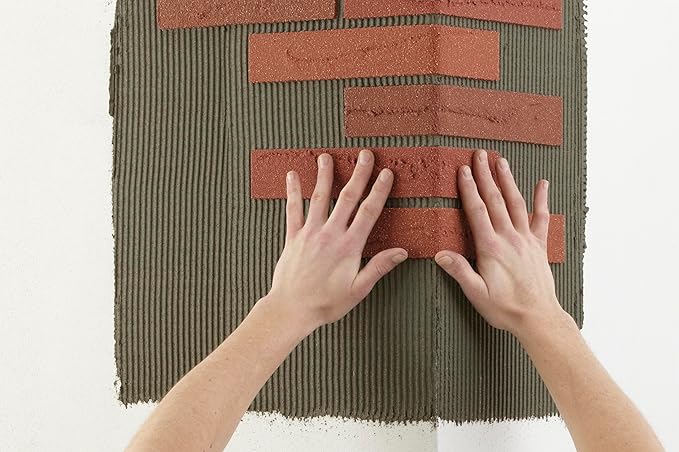
10. First apply the corner brick slips around a corner (Figure 2). Then press the flat brick slips firmly
into the adhesive in the desired bond (Figure 3). A slight sliding motion is enough. The back of
the brick slip should sit fully in the adhesive mortar. You can check this by removing an applied
brick slip from the facade and checking the back of the brick slip for complete adhesive coverage.
Work from top to bottom. This avoids contamination of the brick slips already applied.
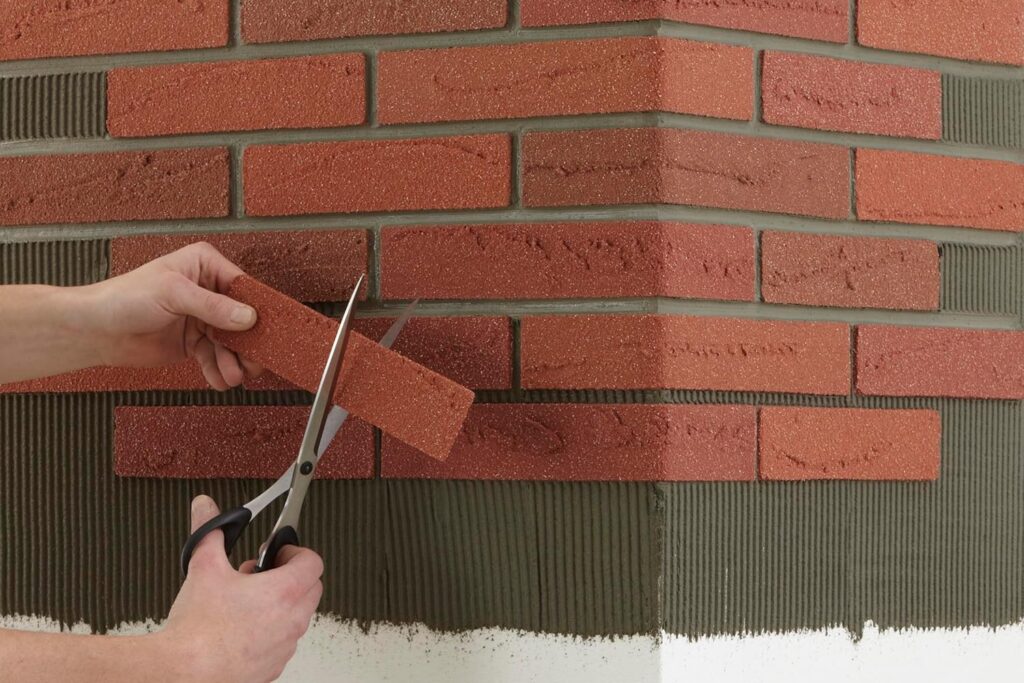
11. Easily cut the brick slips (dust free) to size with a scissor, anvil shear or a cutter (Figure 4).
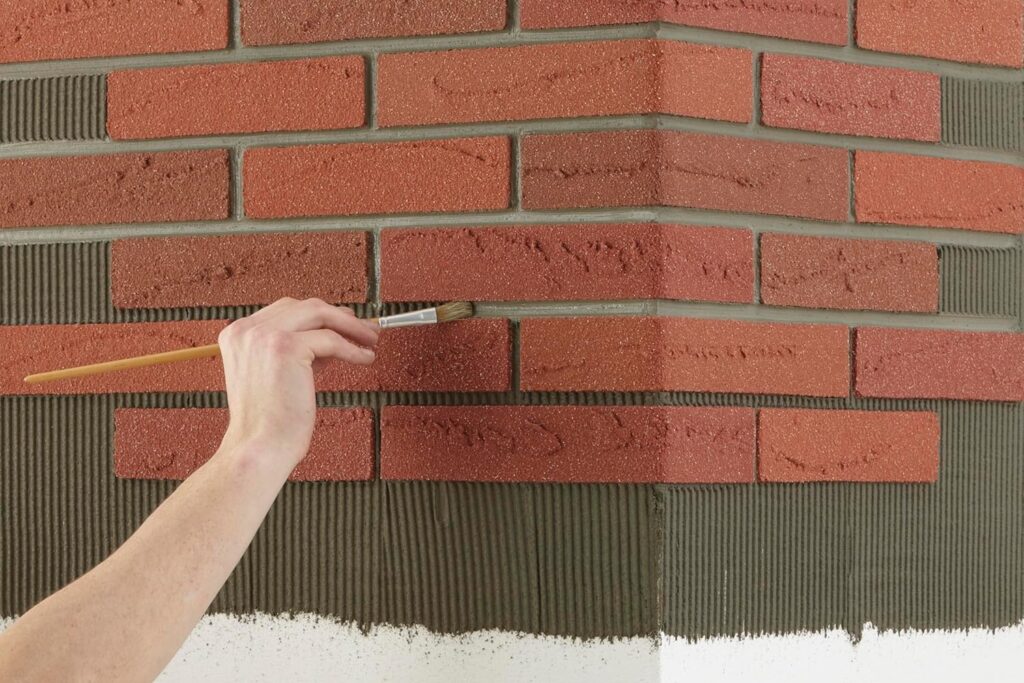
12. Immediately after applying the brick slips, smooth the joints with a moist brush (Figure 5). Hold
the brush at an oblique angle and smooth both the bottom and top of the joint so that
the adhesive meets the side of the brick slips all around. Moisture must not get behind the
brick slip. Further, openings or gaps must not be visible.
13. Smoothen the vertical joints first and then the horizontal joints with a long motion.
14. Remove any adhesive mortar spots immediately (when the adhesive mortar is still wet). This can
be done with clean water. Do not allow the adhesive to dry! A dabbing motion with damp cloth
or paper is enough.
15. If you are applying the brick slips outdoors, protect them from the wind and weather for at least
3 days. In high humidity and/or low temperature, it can take longer for everything to dry.